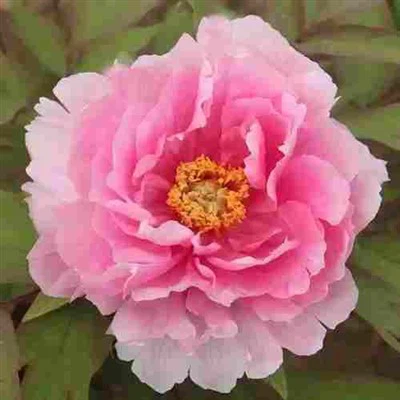
As a supplier of Blue Tree Peony, I'm often asked about the best ways to propagate these exquisite plants. Blue Tree Peonies, with their rare and captivating hues, are a prized addition to any garden. In this blog, I'll share some detailed and scientific methods for propagating Blue Tree Peonies, drawing from my years of experience in the field.


Understanding Blue Tree Peony
Before delving into propagation methods, it's essential to understand the Blue Tree Peony itself. Unlike common herbaceous peonies, tree peonies are woody shrubs that can live for decades, sometimes even over a century. The Blue Tree Peony is particularly renowned for its large, showy flowers that range from soft lavender - blue to deep indigo tones. These plants thrive in well - drained soil, partial shade, and a climate with distinct seasons.
Propagation Methods
1. Division
Division is one of the simplest and most common methods of propagating tree peonies. It's best done in the fall, usually around September or October.
- Selecting the Parent Plant: Choose a healthy, mature Blue Tree Peony that is at least 3 - 5 years old. A well - established plant will have a strong root system and sufficient energy to support new growth.
- Preparing the Tools: You'll need a sharp, clean spade or a pruning saw. Make sure the tools are disinfected to prevent the spread of diseases.
- Digging Up the Plant: Carefully dig around the base of the plant, keeping as much of the root system intact as possible. Lift the plant out of the ground and gently shake off the excess soil.
- Dividing the Plant: Examine the root system and look for natural divisions or sections with at least 2 - 3 shoots and a good amount of roots. Use the spade or saw to separate these sections. Each division should be large enough to survive on its own.
- Replanting: Plant each division in a prepared hole in a well - drained location. The soil should be a mixture of loam, compost, and a small amount of sand. Water the newly planted divisions thoroughly and mulch around them to retain moisture.
2. Grafting
Grafting is a more advanced propagation method but offers several advantages, such as faster growth and the ability to combine the desirable traits of different peony varieties.
- Rootstock Selection: For Blue Tree Peonies, common rootstocks include the roots of other tree peony species or even some herbaceous peonies. The rootstock should be healthy, disease - free, and have a similar growth rate to the scion (the part of the Blue Tree Peony being grafted).
- Scion Preparation: Select a healthy, one - year - old shoot from the Blue Tree Peony. Cut the scion to a length of about 5 - 10 cm, making sure it has at least 2 - 3 buds.
- Grafting Technique: There are several grafting techniques, but the most common for tree peonies is the cleft graft. Make a vertical cut in the rootstock about 2 - 3 cm deep. Insert the prepared scion into the cut, ensuring that the cambium layers of the scion and rootstock are in contact. Secure the graft with grafting tape or a rubber band.
- Aftercare: Place the grafted plant in a warm, humid environment, such as a greenhouse or a plastic tent. Keep the soil moist but not waterlogged. After a few weeks, the graft should start to heal and new growth should appear. Once the graft is well - established, it can be transplanted into a larger container or directly into the garden.
3. Seed Propagation
Seed propagation is a more time - consuming method, but it can be rewarding as it allows you to grow new Blue Tree Peonies from scratch.
- Seed Collection: Collect the seeds from mature Blue Tree Peony pods in the fall. The pods should be dry and starting to split open. Remove the seeds and soak them in water for 24 - 48 hours to soften the seed coat.
- Stratification: Tree peony seeds require a period of cold stratification to germinate. Place the soaked seeds in a plastic bag with some moist peat moss or vermiculite. Seal the bag and store it in the refrigerator at a temperature of about 2 - 5°C for 3 - 4 months.
- Sowing the Seeds: After the stratification period, sow the seeds in a seed tray filled with a well - drained seed - starting mix. Cover the seeds with a thin layer of soil, about 1 - 2 cm deep. Keep the soil moist and place the tray in a warm, bright location, but out of direct sunlight.
- Transplanting: Once the seedlings have developed their first true leaves, they can be transplanted into individual pots. It may take several years for the seedlings to reach a size where they can be planted in the garden and start to flower.
Caring for Newly Propagated Blue Tree Peonies
Regardless of the propagation method used, newly propagated Blue Tree Peonies require special care to ensure their survival and healthy growth.
- Watering: Keep the soil evenly moist but not waterlogged. Overwatering can lead to root rot, while underwatering can cause the plant to dry out and die.
- Fertilizing: Use a balanced, slow - release fertilizer in the spring and fall. Avoid over - fertilizing, as this can lead to excessive foliage growth at the expense of flower production.
- Pruning: Prune the plants in the early spring to remove any dead, damaged, or diseased branches. This will help to promote new growth and improve the overall shape of the plant.
- Pest and Disease Control: Monitor the plants regularly for pests such as aphids, scale insects, and fungal diseases. Use organic or chemical controls as needed, following the instructions carefully.
Conclusion
Propagating Blue Tree Peonies can be a challenging but highly rewarding endeavor. Whether you're a home gardener looking to expand your collection or a professional grower, these propagation methods can help you grow healthy, beautiful Blue Tree Peonies. As a supplier of Blue Tree Peonies, I'm always here to provide support and advice on propagation and plant care. If you're interested in purchasing Blue Tree Peonies for your garden or nursery, or if you have any questions about propagation, please feel free to contact me for further discussion and procurement negotiation.